Posts

Showing posts from December, 2021

How to set up and use Deferral in Business Central

Image
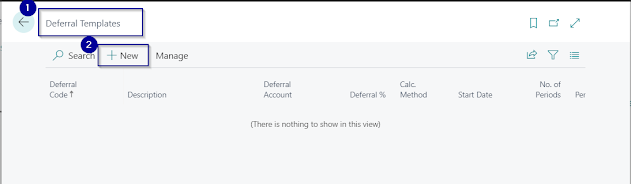
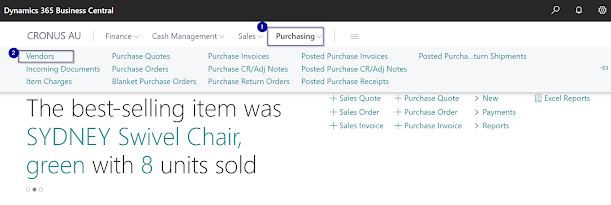
 To recognize a revenue or an expense in a period other than the period in which the transaction was posted, standard Microsoft Dynamics 365 Business Central functionality can be used to automatically defer revenue and expenses over a specified schedule. Let's take a look at one of business scenarios when Unearned Revenue is deferred over 12 months. 1. Create a new Deferral Card : navigate to Deferral Templates and select New+ from the toolbar. 2.  In the new Deferral Template , enter a Code and Description.  Select the relevant Balance Sheet G/L Account under Deferral Account .  Enter the number of periods for the amount to be deferred across and add a Period Description . Note that placeholder codes can be included in this description to automate the insert: %1 = The day number of the period posting date %2 = The week number of the period posting date %3 = The month number of the period posting date %4 = The month name of the period posting date %5 = The accounting period name

How to assign Default Dimensions in Dynamics 365 Business Central

Image
  Microsoft Dynamics 365 Business Central was designed with automation processes and saving time in mind. The ability to add "Dimensions" to any transaction from a customer to a general ledger account to vendor is just one great tool that facilitates to speed up your business process.  Default Dimension setup enables Dimension Values to be either automatically inserted at transaction entry level or enforced for user data-entry. Assigning Default Dimensions to master records and those records are used in a transaction, it will be posted with assigned Default Dimensions. Let's take a look how to set up Global Dimensions as Default Dimensions for all Income Statement Accounts. 1. Set up Global Dimensions on General Ledger Set Up. 2. Navigate to Chart of Accounts and select the Filter option under Income/Balance column. 3. Filter Income Statement Accounts only by selecting Income Statement. 4. Select all the income statement accounts by clicking on the ellipsis and ch

How to Import a Bank Statement File for Bank Reconciliation in Dynamics 365 Business Central

Image
 In this article, let's take a look how to import CSV file of your monthly bank statement into Dynamics 365 Business Central for smooth and quick bank reconciliation process. 1. Navigate to Data Exchange Definitions .  2. Under General Tab on  Data Exchange Definition Card. 1 .  Code = a code for the report purpose ( in my example,  BANKSTMTCSV) 2. Name = description of the purpose  3.  File Type = Variable Text 4.  Type = Bank Statement Import 5. File Encoding = WINDOWS 4. Column Separator = Comma 5. Reading/Writing XMLport = 1220 6. Ext. Data Handling Codeunit = 1240 3.   In the Line Definitions tab below define the correct value for Column Count that matches the number of columns in your bank statement CSV file that you will be importing. 4. In the Column Definitions tab , match each line you plan to import to a corresponding column in the CSV. 1. Column No. = Which column number in the CSV file this line refers to. 2. Name = Name for the column title in the CSV file.

How to set up Vendor Bank Account for EFT Payments in Dynamics 365 Business Central

Image
In my previous articles, we have discussed the structure of EFT file and how to generate ABA file in Business Central.  Important step in EFT payments processing is to set Vendor Bank Account Information correct. Let's take a look at that today! 1. Please navigate to Vendors under Purchasing and open relevant Vendor Card: 2. On Vendor Card, navigate down to Payments Tab to enable EFT payment field. Under Vendor Bank Account Code , please click on the drop down arrow to select +New for a new Vendor Bank Account . 3. On Vendor  Bank Account Card , populate Code and general bank details information such bank address, Bank contact person name, Bank Account detail. Important to populate EFT BSB no. under  Transfer Tab . Now, you are all set to run EFT payments in Dynamics 365 Business Central!  Please comment below if there are any questions that I can help. #businesscentral   #msdyn365bc   #erponsulting   #technologythesedays   #microsoft     #dynamics365businesscentral  #eft #

How to process EFT payments in Dynamics 365 Business Central

Image
In previous article, we discuss the ABA file layout and how to configure Business Central for EFT payments. Here is the link to refresh your knowledge: Now let's take a look how to process EFT payments in the system: 1. Go to Payment Journal under Cash Management : 2. Select the Payment Journal that is specifically set up for EFT payments.  3. To create a new Batch Template dedicated for EFT payments, please make sure to populate  Balance Account Type and enable   Allow Payment Export. *   Balance Account Type  – select Bank Account that has been set up with EFT bank details *   Allow Payment Export  – always tick the field to enable export ABA file 4. On the Payment journal line, tick EFT payment box. If it is not visible on your interface, please use Personalization . 4. Under Document type , select Payment and choose Vendor from the drop-down list. 5 . Eft Bank Account and Recipient Bank Account must be populated.  I will cover Vendor Bank account creation in next article

EFT file in Dynamics 365 Business Central

Image
One of the most asked question is how to create ABA file in Dynamics 365 Business Central and what is ABA file. First, the Australian Bankers Association (ABA) or Cemtext file format is a format used by banks to allow for batch/import payment transactions. What does an ABA file look like? Each line in an ABA file is a "record". An ABA file has three main records, the "descriptive" record, a "detail" record for each transaction and the "file total record" at the end. An ABA record is exactly 120 characters long.   Example EFT Transfer File generated from Dynamics BC to be imported into Bank.   1.         EFT Bank Code=WWB. This is the EFT Bank Code for World Wide Bank (CRONUS data) 2.         EFT Security Name = TEST Company  3.         EFT Security No. = 6567890. This is the EFT Security No. for World Wide Bank. 4.         EFT Payments File generated from Business Central – File Name = TEST 5.         EFT Payments File generate